|
| |
covered on this page -
D.I.M.
(Did it Myself) TOOLS
& TIPS
The
Workshop
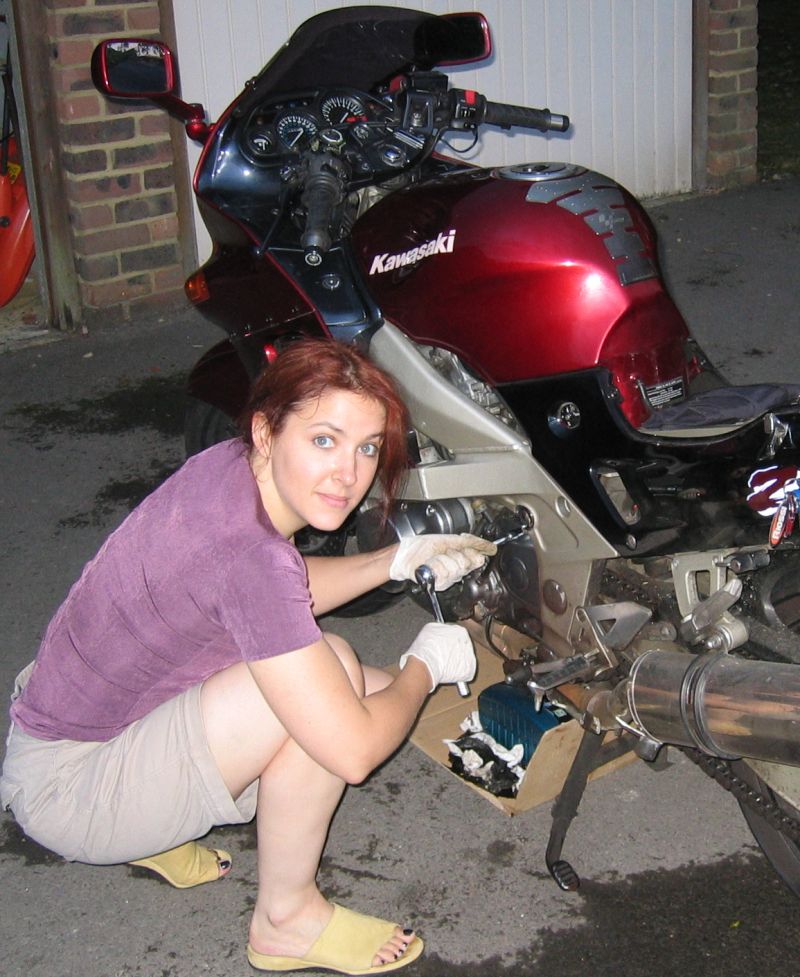
 When I first began
riding there was no question of working on my bike myself, no way. For starters
I'm clumsy, impatient, don't really understand engines or technical stuff. Plus
the thought of doing something wrong made sure that even for the simplest of things
I would pop down to Chasbikes in SE1 regularly. Eventually the mechanics there
encouraged me to think about doing very minor things, whether this was an
effort to give me confidence to try or just to cut down on the number of times
I'd pop in for a chain adjustment I'm still not sure. What I do know is that
without that kind of establishment where you can quite simply stand over your
mechanic, ask questions, help and hinder, I would never have seen how simple
some things are nor have had the courage to even consider working on my own bike. When I first began
riding there was no question of working on my bike myself, no way. For starters
I'm clumsy, impatient, don't really understand engines or technical stuff. Plus
the thought of doing something wrong made sure that even for the simplest of things
I would pop down to Chasbikes in SE1 regularly. Eventually the mechanics there
encouraged me to think about doing very minor things, whether this was an
effort to give me confidence to try or just to cut down on the number of times
I'd pop in for a chain adjustment I'm still not sure. What I do know is that
without that kind of establishment where you can quite simply stand over your
mechanic, ask questions, help and hinder, I would never have seen how simple
some things are nor have had the courage to even consider working on my own bike.
Once I'd bought my ZZR
the fear of doing something wrong was intensified, however following my accident
in Oct 2003, two very good friends helped me to put my bike back on the road.
Watching Steve and Andy working on my bike made me think about maybe having a
go. Andy was always quick to reassure me that there wasn't a lot I could do
wrong. I bought the Haynes manual, but to be honest it put me off a bit (I've
never been one for reading instructions). One of the boys at Chasbikes showed me
quite clearly how to adjust my chain, so, finally one day I had a go and it
really was quite simple. The feeling of having "Done it Myself" was one of such
pride you would have thought I'd built the whole bike!
Things are not always
so straightforward but I think I learn from my mistakes, non of which have been
too bad or costly. Following shows my progression from chain adjustments to
today and will continue to plot my mechanical/technical development.
D.I.M.
- Did it Myself
| Jan
04
Hugger fitting
Difficulty -
turned out to be too much for me!
|
Fitting a hugger might
be simple for some. Andy reassured me by phone I could do it, I had the right
tools so I was off and running. This early in my mechanical education I had no
knowledge of soft Kawasaki screws and ran into trouble getting my old chain
guard off. Screw 1 came out fine, no. 2 wasn't having any of it and the head was
soon almost unrecognisable. I tried everything I could think of, hammering a
straight screwdriver into the mess in an attempt to get some grip, to no avail.
I then had the brainwave to try to use the chain guard to turn the screw as it
was flexible enough to bend. As the whole shebang was attached to what seemed to
me to be a major part of the bike I wasn't overly worried.
However
when that soft thunk came and I realised I had just managed to break the fitment
clean off the swingarm I was more than a bit worried. How could metal be that
soft? A quick phone call to Andy (who seemed to find it quite amusing!)
confirmed I couldn't exactly ride without a chain guard. Another quick call to
Chasbikes confirmed if I was patient they'd see what they could do. So all in, a
bit of a disaster really, but I didn't panic and it didn't put me off. Chasbikes
created a bracket for the hugger to attach to and I kept the original fitment
and had Banjax ally weld it back on when my ZZR was repaired again in Jan 05.
|
| |
|
| Mar
04
New
Race Cans
Difficulty 2
(with a little help from a
friend!)
|
Well
I'd been hankering for a pair of nice loud cans, I found an offer from
Venom (Motad) on Ebay, but I didn't entirely trust Ebay back then so spoke
directly to Venom to ask if I could do the deal straight through them,
which I did. Mikey (then, my riding buddy) offered to help me with them,
which, while normally "help" would entail me watching other
people do things for me, I can honestly say I did well over 50% of the
work myself.
Getting the old
cans off was a doddle, getting the new ones in place was a bit trickier as
we had some trouble fitting one of the tertiary pipes into the can, but we
got there in the end. We ended up having to finish the job another day as
we needed to order in some gaskets (I now never forget to order any
possible gaskets in advance!) and some exhaust paste.
Lining the pipes
up and getting them just right took the longest but again it was a great
feeling to see what I'd managed with a little help from a friend!
|
|
|
|
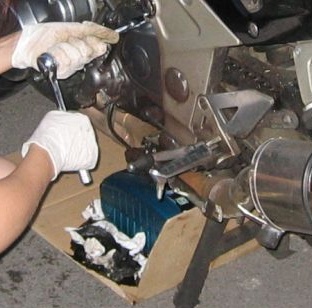
| Aug
04
Oil & Filter
Difficulty 2
New Chain & Sprockets.
Difficulty 3
(more muscle needed)
|
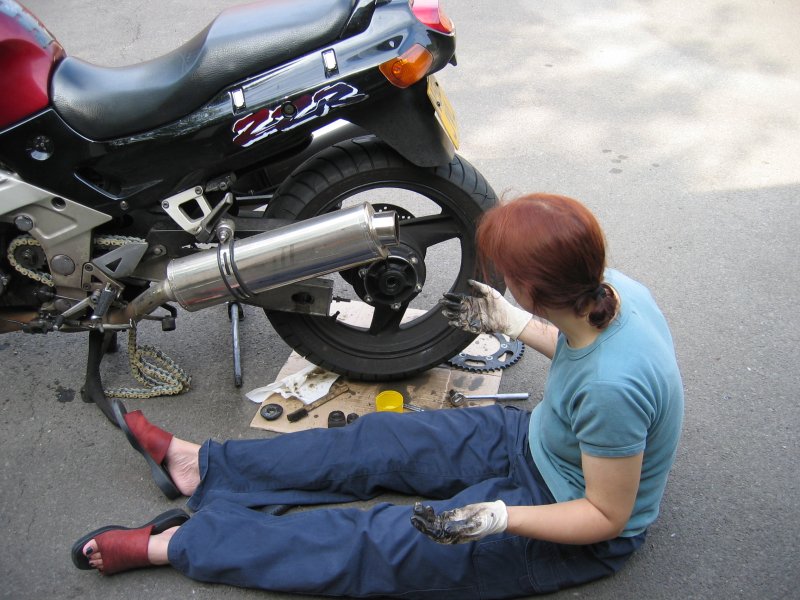
Mikey
convinced me that an oil and filter change was not beyond me. By now I was
proficient with chain adjustments; I knew how all my bodywork came apart
and in what order it went back together. I read the relevant Haynes
section and set about it. With a ZZR half the battle with any job is
getting all the relevant bodywork off, this task is made even longer if you
have crash bungs as you need to take the crash bung bolts (main engine
bolts!) out every time. Once I became confident that the engine wasn't
going to fall out without these crucial bolts in place I relaxed. I needed
some help to get the filter off and out from between the header pipes -
this is still a difficult task to this day but otherwise I did good. I
left the bodywork off in anticipation of the next days task - chain &
sprockets!
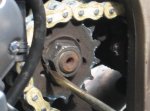
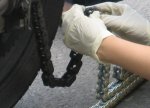
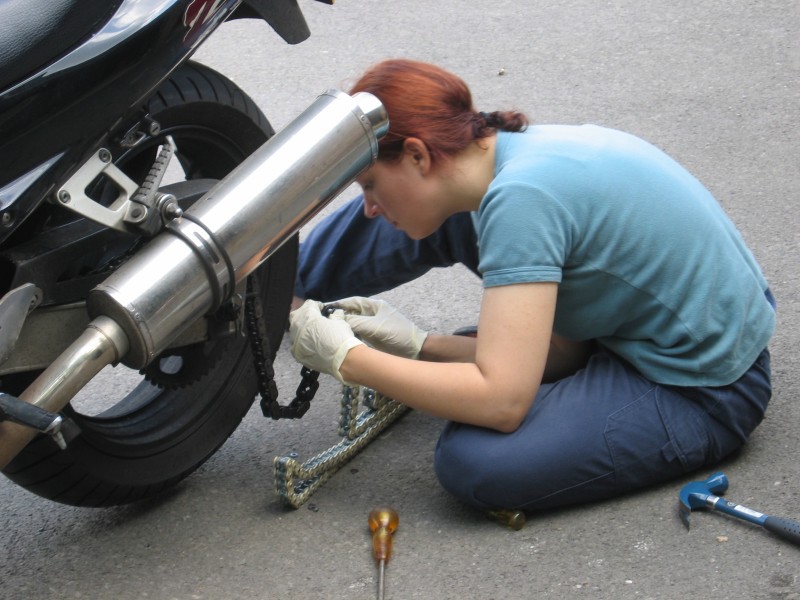
We'd
bought an angler grinder to get the chain off as that's what I'd seen the
lads use at Chasbikes. I had fun cutting the chain off and diligently attached the new chain to the old to thread it through, again as I'd seen
done before. Getting the sprocket off the back wheel wasn't too bad
although I did need help to crack the nuts open. This was also my first
introduction to a torque wrench. If I hadn't had help there is no way I
would have got the front sprocket off. With me standing on the back brake
and Mikey using the arm of the paddock stand on the wrench for leverage
the bike was still lifting before it finally cracked open. As we didn't
have a chain tool I'd gotten a split link to use temporarily until I could
pop into Wheelpower to have them put a fixed link in place. Getting the
split link on was much harder than we anticipated but we got there in the
end.
We've
since bought a chain tool although it doesn't work on all chain types as
we discovered later.
|
| |
|
Sept 04
Brake Overhaul
Difficulty 3
|
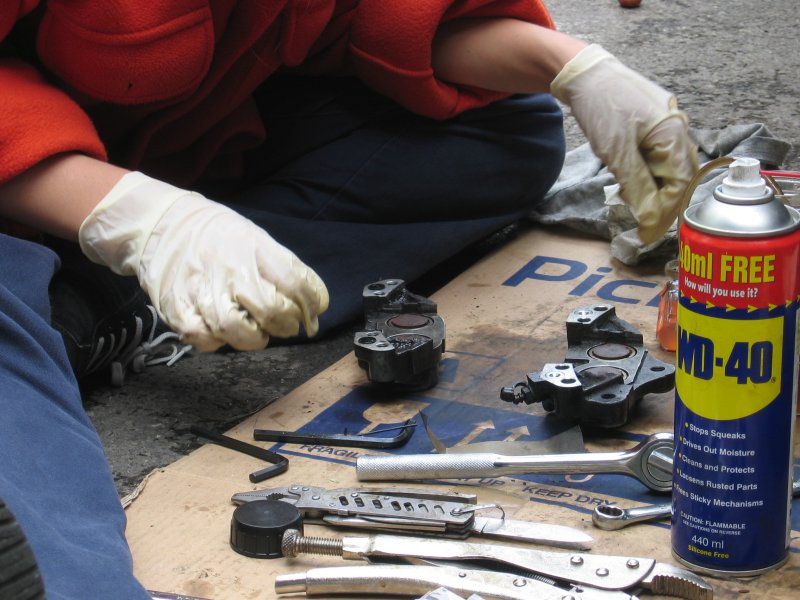
My brakes were in a bit of a state, again Mikey convinced me
I could do it. I did manage it, learning a few lessons into the bargain;
do one pot at a time (two, diagonally if they pop easily), much easier, you need lots of brake fluid for this
job, do NOT use mole grips, EVER on your brake pistons.
In the end only the dust seals needed replacing, the pistons were
pretty worn but they'll do for now. New pads as well of course (you should
always replace your brake pads when you overhaul the calipers). It took me
all weekend basically as it took me a while to realise that without
anything to push the pistons out with like a compressor the best way was
to do one at a time. Splitting the calipers apart was hard. Apart from
some advice and a bit of muscle Mikey was able to just observe. Go me!
|
|
|
|
| Mar 05
Running Repairs
Difficulty 2
(pride goeth before a fall)
|
After feeling chuffed with myself swapping a broken
indicator for simply a scuffed one, I was feeling relaxed and confident
enough to have a go at fixing my broken heated grip on the throttle hand.
Motrax had very kindly sent me a replacement grip so it all seemed pretty
easy really...
It all started so well. Rather than just
jump in feet first I used my head and tested the replacement part first, plugged
it all in, switched them on and yes it works, so far so good. I get the bar end
off (R&G bar ends, fitted myself you know), tug the old grip off, no big deal. I try to put the new one on, bearing in mind I'm
basically twisting the throttle tube as far as it will go one way, twisting the
grip further and pushing at the same time, turning it all the way back to the
stop and twisting it again... well it wasn't working. So I tried a bit of WD40,
thinking that at least it would evaporate and then it wouldn't slip whilst the throttle
was in use... no good. So I tried some grease (getting desperate by now). Got it
3/4 way on.. wouldn't go any further. So I'm giving up, trying to get the damn
thing off again now to think of a new idea... my hand hurts from the twisting
and its a real effort... SNAP... my heart fell through my chest, that horrible
feeling, when you know you just did a bad, bad thing.
Not good. I took the switchgear apart and
sure enough, where the cable ends slot into the tube, I'd broken the housing. I
felt like the biggest idiot in the world. It got worse when I tried to get the
damaged tube out of the grip... I broke the top of the tube off... I can laugh
about it now but I admit that at the time I put it all in the garage and
went into the house and refused to come out for the rest of the day!
I ordered the replacement part from
Cradley which unfortunately comes prefitted with a grip. I managed to get
this off by coating the whole thing with fairy liquid and peeling the grip
back down over itself. Once I'd managed to get the broken tube out of the
new heated grip (with some help from Mikey) I used fairy again to coat the
tube and the grip slipped on easy as pie.
I did have the extra job of now
having to refit the throttle cable etc, but surprisingly this bit was
easy, it was quite obvious where everything went and it all popped
together neatly.
I just wish I'd thought of fairy
liquid sooner!
|
| |
|
| Apr 05
Clutch Cable
Difficulty 1 |
In putting all my new panels back on my ZZR (including
fitting various replacement brackets etc) I discovered that my clutch
cable was routed incorrectly and what was more when I tried to rectify it,
it was actually badly split. There was no way I was going to take all the
bodywork off again for a clutch cable, so I managed to fit it without
removing any panels at all and after a couple of goes managed to route it
in a manner that didn't get in anything's way. Haynes was useless on this
point, it only tells you to attach your new one to the old to pull it
through, but of course this assumes correct routing in the first place,
duh!
|
| |
|
| May 05
More Brakes
Difficulty 2
(see, it gets easier with practice!) |
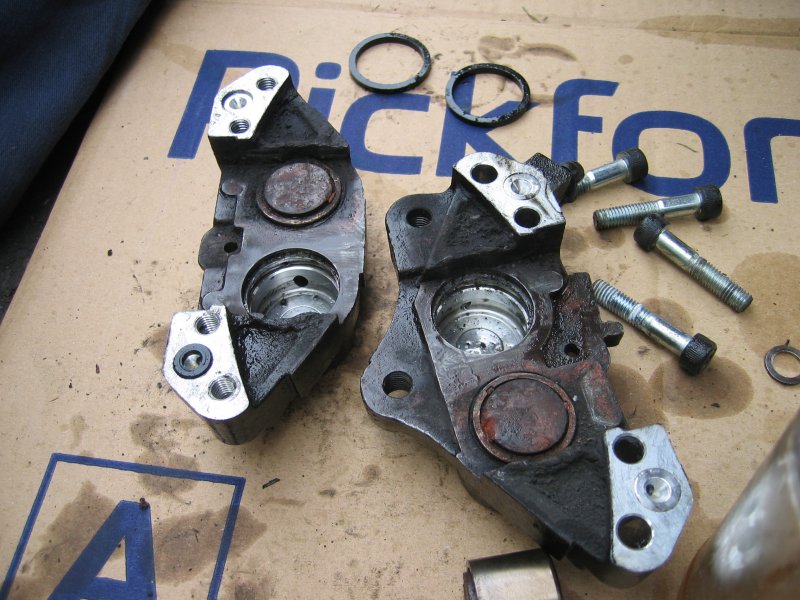
Overhauled the rear caliper on the ZZR and the front on the
GPZ. Back was so much easier than the front being just the one pot. The
GPZ brakes were a mess however having only one caliper (to the ZZR's two)
it was a relatively simple and easy task.
Once again dust seals were replaced and new pads fitted. In the case of
the GPZ packing seals were also replaced.
Even without overhauling the caliper learning to bleed your brakes is
very useful, it's surprising what a little bit of air in your lines can do
to your brakes' responsiveness.
|
| |
|
| June 05
Flushing Coolant System
Difficulty 2 |
I'd been having problems with the ZZR over heating so we
tried bleeding the system, there was a fair amount of air in there so I
went out and bought a new batch of coolant and read up on the Haynes
section for the cooling system. It didn't sound that hard, and it wasn't.
A bit like an oil change, drain it all out, pop the garden hose in,
flush it through, fill up and then bleed (top and bottom)
|
| |
|
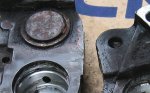
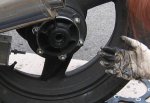
| June 05
More Chains
Cush Drive Replacement
Difficulty 2
|
After the success I had with the ZZR I wasn't too worried
about doing the GPZ. When I took the front sprocket cover off I was amazed
how easily the sprocket came off - it had a different type of closure,
instead of a big bugger of a bolt it has a small locking mechanism and two
small bolts to hold that in place. Ran into trouble when I put the new
sprocket on in that I assumed those little bolts had to be super tight,
and broke one right off. (This is where a torque wrench comes in
handy)
It is very hard to know which things need all your strength to tighten
and which just need to be snugged up. I persevered, replacing the rear
sprocket and getting the chain on. Our chain tool wouldn't work with the
fixed link so we used the split pin, although I was a little dubious I
believe up to and including 500cc is OK with them.
I had noticed some free play in the rear wheel so ordered a new cush
drive which I popped into place whilst the wheel was off, the old one was
badly worn.
Collected the new bolt at the earliest opportunity, then came the bit I
expected to be hard - drilling out the broken bolt. I drilled into the
bolt with a bit about half the size of the bolt thread. Once I'd gotten
about 1-1.5mm in I use a star drive screwdriver head to wedge into the
hole and simply unscrewed the bolt. Sorted.
|
| |
|
| Sep 05
Brake Switch
Difficulty 1 |
The brake light for the front brake hadn't been working for
some time on the GPZ, however as I don't brake without using the rear it
wasn't a huge priority for me.
Chatting with the lads at Wheelpower it was confirmed that it would be
the switch and sure enough when I looked the push pin was broken.
A simple matter of unscrewing the throttle switchgear and removed the
old part (1 screw) and putting the new one in place and fitting the
switchgear back into place. The only tricky bit is making sure everything
lines back up and remembering what angle it was set at to start off with
(I just did it by eye). Easy Peasy.
|
| |
|
| Nov/Dec 05
Running Repairs & Fault Finding
Difficulty 1 |
The bodywork on the GPZ needed some attention only I wasn't
quite sure what to do about it. My one attempt at fiberglassing a crack in
the ZZR's mudguard was already gaping and proving my repair skills
lacking. I asked in my friendly local auto store, K & K Autos in
Southfields what products he had and came out with a tin of fiberglass
paste. I had a go on the rear panels and sure enough with a good rub down
with coarse grain sandpaper and a bit of patience the paste seemed to work
well. Much easier to mix and deal with than fiber sheets. I moved on to
more complex cracks and even missing fitments (embedding washers in the
paste to form new fixing points). So far all repairs have held up *touch
wood*.
A starting problem ended with my buying a starter motor from a breaker.
In this instance I had the fitting done by Fins however my diagnosis was
correct and the problem was sorted. In diagnosing the problem I swapped
out the solenoid for the one in the ZZR just in case it was that, checked
all the fuses etc.
Having cracked the fitment on the GPZ's exhaust I bodged various fixes,
created a new hanger, even had a pie tin on it at one point. I had a new
piece fabricated which is now held on with jubilee clips which will see me
through to finding a new exhaust (system is an all in one job).
|
| |
|
| Dec 05
Clutch Replacement
Difficulty 2 |
Perhaps this should be classed as a difficulty 1, however I
did make it harder for myself. Immediately following the replacement of
the starter motor the clutch went. OK, it had been slipping a little
but it was still a shock when it went.
I don't have a manual for the GPZ so got some help and advice from the
UK Bike Forum. I won the plates on Ebay at about half the normal price. I
requested the springs (they hold the plates) to arrive at the same time.
They didn't send them. I'd taken the day off to do this (and wait for
British Gas) so I had to get on with it anyway. I figured even new plates
on their own had to make some difference.
Drained the oil and got the cover off, slightly tricky to free the
cover. Got the spring bolts out OK. Installed new plates which had been
soaked in oil beforehand as advised by several sources. Replaced springs
and decided now was a good time to use the torque wrench. Had a quick
gander at it to remind myself how it worked. Set it and got to work. I
didn't pay enough attention to realise what I thought was 6.5lbft was
actually 65lbft. (Our torque wrench only does something like 45-100) Needless
to say the first bolt sheered off and shot across the garage... After a
brief pause I carried on, 5 bolts was a lot on such a small circle, 4
would do for now. Got it all back together without any further help from
the torque wrench, replaced the oil. It took forever to get the old gasket
off the cover, I ended up taking the whole thing into the kitchen (it was
cold!) and scrubbed it off in the sink!
I had a lot of trouble adjusting the clutch cable but I got it to a
point it stopped making a horrible metal grating noise. Took the bike out
to test (by now it was dark) and got about 1/3 mile before I stopped
kidding myself and realised it was still the same. Wasted effort? Well,
lessons were learned.
Springs arrived, along with a new bolt. At the first opportunity I
started the whole thing again. Obviously I was careful not to damage the
new gasket. Once ready I stuffed kitchen towel all around the clutch
basket (I didn't want metal shards in the clutch) before starting to drill
out the broken bolt. I got about 2mm in then simply inserted an allen key
and undid it.
Fit the new springs and replaced the bolts (carefully). Put everything
back together and refilled the oil. Had no trouble this time with the
clutch cable which I felt was a good omen, and indeed everything was fine.
Took it for a run and was back in business, better than ever.
|
| |
|
| Jan 06
General Maintenance
Difficulty 1 |
Front and rear brake pads fitted to GPZ, along with clutch
cable and indicator fixed. Brake pads pretty easy although pistons needed
a little bit of care and coaxing to retreat without ruining seals. I can
see the winter has taken its toll on the seals and will definitely have to
replace all dust seals when I overhaul the brakes come spring time/warmer
weather.
Clutch cable was quick and simple, routing on the GPZ is so obvious and
easy!
|
| |
|
| Apr 06
Carb drain &
Coolant drain
Difficulty 1/2
|
I was suffering some running problems so after a few
suggestions online I tried to drain the carbs. This should be a simple
task - there's a small plug at the base of each carb that when removed
allows the fuel held in the carb to drain out along with the sediment that
builds up over time. No 1 went easy, but No 2 having already had the head ruined
by the previous owner snapped off. I'd ordered a pair of new plugs and
removed the bowl off of the problem carb to drill out the old plug. Wasn't
to be so having already removed the bowl and drained off the sediment and
fuel was happy that the end result had been taken care of. I was amazed
how much sediment was dried solid in the base of the bowl, so much so I
took the bowl off the other which I had already drained. Sure enough there
was still a lot of sediment that the drain hadn't been able to take care
of.
I happened to spot the coolant drain whilst I was putting everything
back together so decided as I knew the coolant was pretty thin to drain
the system and refill it. No bleeding is required on the GPZ but its
always a good idea to run the bike with the rad cap off whilst topping up
the system to let any trapped air out.
|
| |
|
| May 06
Fault finding (electrical)
Difficulty 8! |
OK, maybe 8 is a bit of an exaggeration but I do think this
has been my most difficult task to date, possibly because of my lack of
patience. At least when something breaks or cracks you can see the problem
and get on with fixing it. With electrics you can't see where the break is
- well I couldn't! When I finally found the broken wire I was ecstatic
with joy. I didn't solder the wire back on myself - I don't have an iron,
Beaky did it for me. Learnt the rudiments of working with a multi-meter
though and cleaned lots and lots of connections, removed all the bodywork,
removed the side stand and its switches, removed the ignition barrel,
tank, coils, the list is endless! Got there in the end though!
|
| Sept 06
Chain again
Cush Drive Replacement
Difficulty 1/2
|
Having done it once before it was pretty easy really. I only
needed supervision with the Abba Stand (haven't quite got the knack of
that yet) and a helping hand to get the back wheel back into place whilst
holding all the necessary bits in place.
I was a tad disappointed to need to do the cush drive but when I look
back now it is 16 months since the last so really given that this bike
does pretty high mileage it's actually pretty good!
|
| |
|
| Oct 06
Clutch Replacement
Difficulty 1
|
Since having the head gasket and piston rings replaced I've
been meaning to do and oil & filter change. Given that the clutch had
slipped a few times recently I figured at made sense to do the clutch at
the same time as the oil needs to be drained to do the clutch plates.
Having done it all once before it was literally a piece of cake even
the Abba Stand was easy. I managed to reuse the clutch casing gasket
saving myself a tenner or so. No snapped bolts this time, easy in, easy
out. Clutch performance is much improved as a result.
|
| |
|
| Mar 07
Clutch Replacement
Difficulty 1
|
This really is becoming the easiest task to do on this bike,
even if using the Abba stand has been made harder by the drop of the bike
over the winter bending the sidestand to just such an angle you need to
have the sidestand up whilst finishing off the correct
placement/tightening of the stand. In fact, yes, that bit is the most
difficult part of the job. All done and dusted in about 15 mins.
Feels great as a result. Didn't bother doing the oil as it was only
about 1k miles old, just poured it back. Didn't need to change the gasket
either (as its off and on so regularly!).
|
| |
|
| & Brake Overhaul
Difficulty 2
|
The GPZ's front brake has been calling me for some time but
I had been deaf to it's pleas. For this reason the task was harder and
mankier that it needed to be. Both dust seals were pretty much hanging off
and both pistons were really disgusting, so much so I was actually a bit
ashamed.
I really must remember to look out for some cheap replacement pistons
as both are badly pitted. The improved performance is really something
else!
|
| |
|
| May 07
Oil Change & Cush Drive Replacement
Difficulty 1
|
Well I could do an oil change on the GPZ in my
sleep I think; getting the filter off couldn't be easier (unlike the ZZR)
no tools required for that at all (just rubber gloves against the grime).
I try to use a nice thick oil in the GPZ as it does seem to thin out
quickly and it can get through a couple of extra litres between changes.
I needed to tighten the chain anyway so it seemed like good time to
drop out the back wheel and replace the cush drive. It could have waited
(it's been worse in the past) however the 5mm play has been noticeable
whilst riding and I had a new one ready.
|
| |
|
|
July 07
Carb Clean & Investigate
Difficulty 3
|
This should be pretty easy really, but it gets a
3 as there are some things you do need extra hands for - getting the tank
off and on is pretty fiddly, and getting the diaphragms back into the carbs is
a complete joke (I gave up and got Mike to do it as I just don't have enough
patience) Draining the bowls, again should be easy, but as one of the
drain plugs is ruined and cannot be removed you have to take off at least
one bowl, and once at the underside may as well take off both bowls for a good
clean.
Nothing was obviously amiss but who knows, only time will tell if the
time was spent well! |
| |
|
|
Sept 07
Carbs, Carbs & yes, more Carbs Difficulty 2
|
Practice does make things easier. I have lost
count now of how many times the carbs have come out and gone into the new
GPZ. What I do know is I could probably do it in my sleep, and I no longer
worry if I'm doing it right. Investigated, cleaned, swapped bits between
sets of carbs, broken nails, lost bits of flesh.. Still if it's fixed I'm
happy! |
| |
|
| Feb 08
Shock replacement
Difficulty 3
|
Well I'm saying 3 but in reality it was easy, it was just
hard work to get those bolts loose. In my case I did spray all of them with
some WD40 a good 15 mins before I got started and of course given that I was
essentially doing two bikes (to strip the donor bike and then remove the
offending broken one from the good bike) it had a good long while to work at
the grime on the good bike. It was very difficult but perseverance paid off
as did thinking off different ways to try and get better leverage. I ended
up largely using my boot on the socket wrench whilst using all my strength
to hold the joint of the wrench at the extension. Some of the bolts were
very awkwardly placed making that impossible but again using another wrench
as an extension tended to help.
I did have a slight problem in that the top of the new shock was wider
than the old one and the bushing protruded a little to far so I simply filed
it down until I could get it into the opening. Seems to have done the trick
and I haven't seen any side effects yet. |
Tools
& Tips
This
is by no means a definitive list and is intended for the nervous beginner. The
following is my opinion born of experience only I am by no means qualified to
preach on this subject so cannot be held accountable for any cock-ups if you
follow my advice. It is intended only as a rough guide.
The
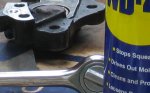
first thing you should do is invest in a tub of copper grease (get copper
grease, no other works quite as well). If you complete every job with your
copper grease at hand using a thin coating on all your screws and bolts you
won't have as much trouble getting things off next time you come to work on the
bike.
My
main tool kit I received as a driver one Christmas (upon request) to keep in the
car. I very, very rarely used it back then but these days we are inseparable.
Its a Halfords kit in a leather holder and from memory contains;
Adjustable
wrench (or monkey wrench as they call them from where I come from)
Socket
wrench 3/4 inch drive
Socket
wrench extension
sockets
8mm-17mm
2
pairs pliers (one larger, one smallish)
Multi
Driver (screwdriver with lots of heads)
12
different heads for multi driver
Wire
brush
set
of allen keys (metric)
and
a couple of other small items.
This
is enough to get you started, in fact its not often I use other items. Although
I do sometimes use Mikey's spanners when a socket wrench won't quite fit. You'll
need a much larger socket for your wheel nut if you intend to adjust your chain,
the GPZ is a 24mm, and the ZZR 27mm. You may also need a 3/4 to 1/2inch drive converter
as most large sockets are 1/2" drive.
I
don't recommend a torque wrench unless you know what you're doing with it!
Don't
forget your bike usually comes with a tool kit. Whilst many of the items in
there are intended for emergency only the spanners are fairly robust.
Before
you start any job make sure you have a clean starting point. Make sure you have
enough rags if the job is intended to be messy (draining oil/fluids) along with
something to put old fluids in - you cannot just tip them down the drain! Use a
sheet of cardboard or something like it as a surface to place all bits you
remove from the bike so you cannot accidentally lose something on the ground.
Most
of all - take your time. Do not attempt any job with a deadline. If it's not
going well, stop, take a break and then come back to it fresh. Some people find
it helpful to use a digital camera to take picture along the way to help them
remember where things go, or to number parts for the same reason. I'm lucky that
I have a good memory so do not normally have a problem with this.
Whatever
happens don't get angry with the bike, its not it's fault. Stop, phone a friend
(preferably with more knowledge than you!) if it's going wrong.
Remember,
relax and have fun, it's all part of biking.
 Oh,
and girls, be prepared to get dirty! Oh,
and girls, be prepared to get dirty!

Copyright © 2003 by Girlie_Biker/Girlie-Biker. All rights reserved.
Revised:
07 Jul 2012 11:45:21
.
|

 When I first began
riding there was no question of working on my bike myself, no way. For starters
I'm clumsy, impatient, don't really understand engines or technical stuff. Plus
the thought of doing something wrong made sure that even for the simplest of things
I would pop down to Chasbikes in SE1 regularly. Eventually the mechanics there
encouraged me to think about doing very minor things, whether this was an
effort to give me confidence to try or just to cut down on the number of times
I'd pop in for a chain adjustment I'm still not sure. What I do know is that
without that kind of establishment where you can quite simply stand over your
mechanic, ask questions, help and hinder, I would never have seen how simple
some things are nor have had the courage to even consider working on my own bike.
When I first began
riding there was no question of working on my bike myself, no way. For starters
I'm clumsy, impatient, don't really understand engines or technical stuff. Plus
the thought of doing something wrong made sure that even for the simplest of things
I would pop down to Chasbikes in SE1 regularly. Eventually the mechanics there
encouraged me to think about doing very minor things, whether this was an
effort to give me confidence to try or just to cut down on the number of times
I'd pop in for a chain adjustment I'm still not sure. What I do know is that
without that kind of establishment where you can quite simply stand over your
mechanic, ask questions, help and hinder, I would never have seen how simple
some things are nor have had the courage to even consider working on my own bike.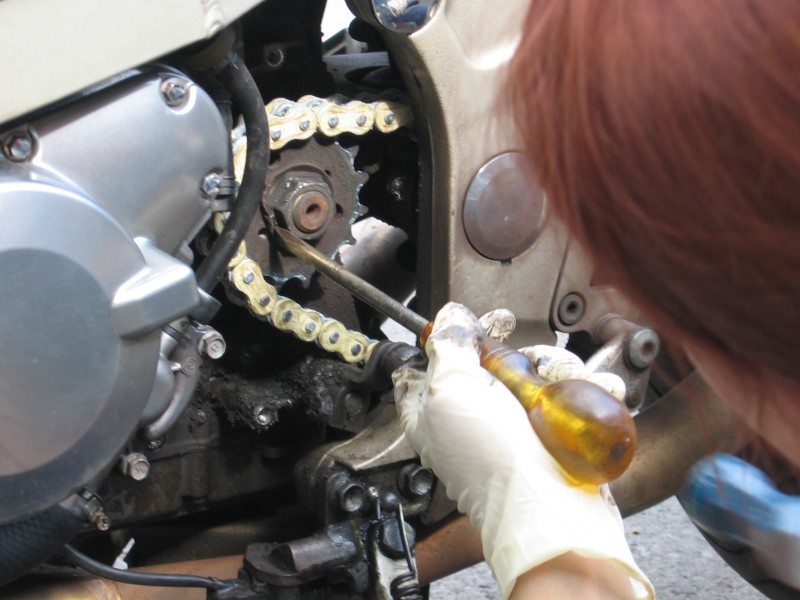
 Oh,
and girls, be prepared to get dirty!
Oh,
and girls, be prepared to get dirty!